Recently, I created my personal blog with TailwindCSS and NuxtJS. I really enjoyed working with Tailwind for creating UI design. In the beginning I had my concerns too, like it'll add lot more boilerplate to my markup. It does add lot of markup but there are ways to reduce the boilder (e.g using @apply).
What is Tailwind?
A utility-first CSS framework forrapidly building custom designs.
That means we have classes defined for all the common css properties. If you have converted designs to html before. You might remember, if we don't follow best practices. We might end up with same properties defined in different classes with different naming convensions.
e.g. let's say we have added two classes that both do the same functionality. It may happen if we don't already know if we have class defined or not.
.padding-4 {
  padding: 4;
}
.p-4 {
  padding: 4;
}
Now let's see how we can tackle this with tailwind. We basically have utility classes for all the css properties. So, we no longer need to define the custom css classes (But if we need we can).
e.g For padding, in tailwind we have classes like following
    // here 4 (1rem) is size (can vary)
    .p-4{} // padding in x and y direction
    .px-4{} // padding in x direction
    .py-4{} // padding in y direction
So, here you can see we no longer have to define the custom class for padding, we can use tailwind builtin classes.
Using Tailwind with Angular 10
Installing Angular CLI
npm install -g @angular/cli
Creating Angular Project
We can go to the directory of our choice where we want to create the project.
ng new ng-tailwind-part1
Open the project inside the code editor, if you are using vscode you can change the directory to the project and type code .
Using Tailwind CDN
We can go to https://cdnjs.com/libraries/tailwindcss and copy the tailwind css cdn link.
Following is the link you will find,
https://cdnjs.cloudflare.com/ajax/libs/tailwindcss/1.6.2/tailwind.min.css
Go to src/index.html
add the cdn in the link tag
<link
  rel="stylesheet"
  href="https://cdnjs.cloudflare.com/ajax/libs/tailwindcss/1.6.2/tailwind.min.css"
/>
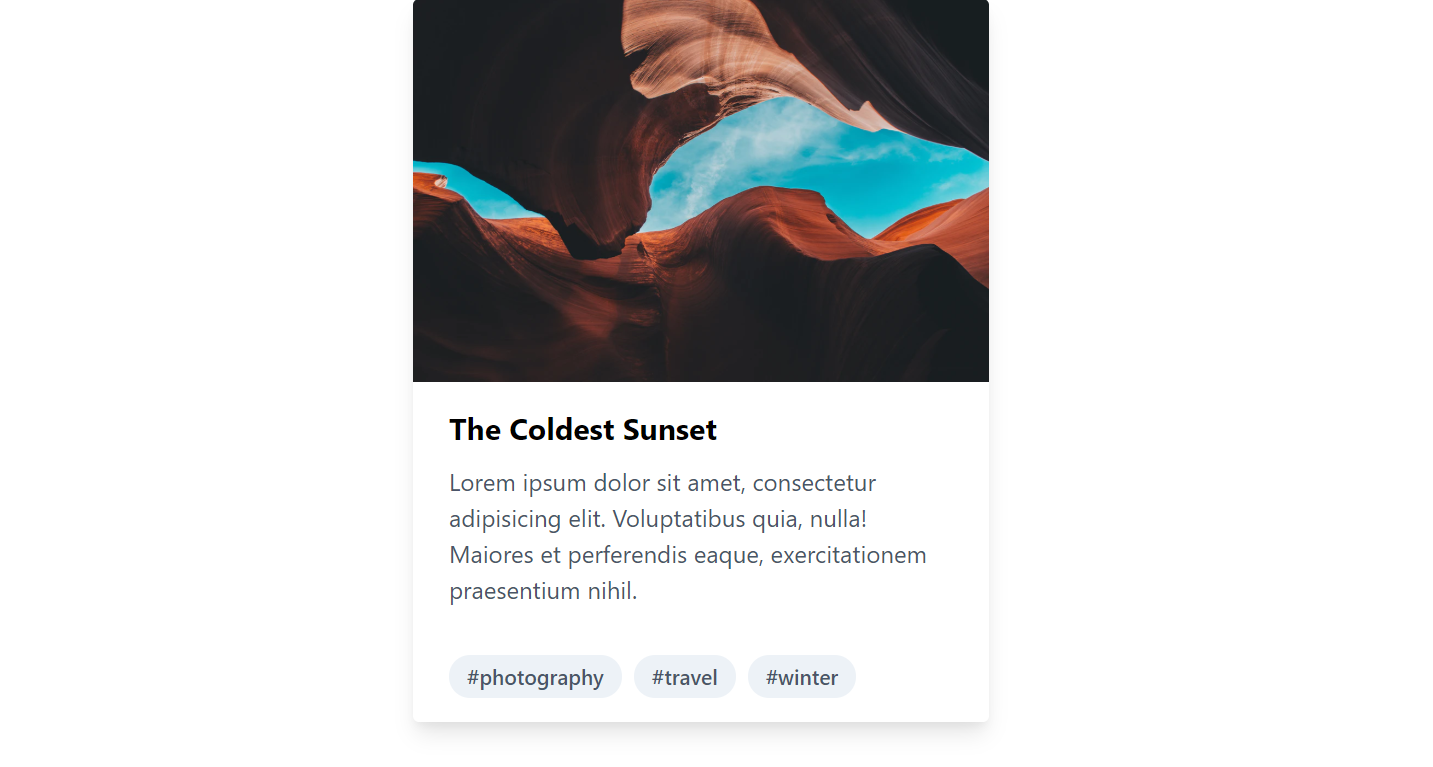
Add the following markup inside src/app/app.component.html
Remove the existing code inside the file and add the following,
<div class="max-w-sm rounded overflow-hidden shadow-lg mx-auto">
  <img
    class="w-full"
    src="https://images.unsplash.com/photo-1512428197675-daae5d4e1e43?ixlib=rb-1.2.1&ixid=eyJhcHBfaWQiOjEyMDd9&auto=format&fit=crop&w=1053&q=80"
    alt="Sunset in the mountains"
  />
  <div class="px-6 py-4">
    <div class="font-bold text-xl mb-2">The Coldest Sunset</div>
    <p class="text-gray-700 text-base">
      Lorem ipsum dolor sit amet, consectetur adipisicing elit. Voluptatibus
      quia, nulla! Maiores et perferendis eaque, exercitationem praesentium
      nihil.
    </p>
  </div>
  <div class="px-6 py-4">
    <span
      class="inline-block bg-gray-200 rounded-full px-3 py-1 text-sm font-semibold text-gray-700 mr-2"
      >#photography</span
    >
    <span
      class="inline-block bg-gray-200 rounded-full px-3 py-1 text-sm font-semibold text-gray-700 mr-2"
      >#travel</span
    >
    <span
      class="inline-block bg-gray-200 rounded-full px-3 py-1 text-sm font-semibold text-gray-700"
      >#winter</span
    >
  </div>
</div>
Run the project using the following command
ng s -o
If you're seeing the following output that means you have successfully integrated tailwind inside your angular project.
Note: This is not the best approach, in the coming articles of this series we'll see how we can use the tailwind css npm module and integrate it inside the Angular project.